Saturday, March 25, 2006

Friend Tin


images copyright Stampin' Up! 1995-2006

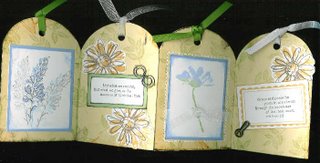
Friend tin

Stamps: Looks Like Spring (Only available between March 1, 2006 through May 31, 2006)
Paper: Very Vanilla card stock: 1-1/8" x 1-7/8"; 1" x 1"
Spring Showers double-sided Designer Series paper:11" x 1"; 4-7/8" x 5-1/2"; 2" x 3/4"
Ink: Barely Banana Classic Stampin' Pad®, Bashful Blue Classic Stampin' Pad
Stampin' Up! Accessories: Twill tape, Linen thread, Subtles beads, Aged Copper Hodgepodge Hardware
Spring Bouquet Flower punch, Word Window punch, 1/16" Circle punch, Sanding block

CD tin (think AOL)

Instructions

1. Adhere flower Spring Showers paper to CD tin. Trim edges and sand using sanding block to ensure close fit.
2. Attach triangle ring fastener to twill tape with brad. Adhere twill tape to striped Spring Showers paper. Fold around tin, and adhere ends together on back side.
3. Stamp friend image in Bashful Blue ink on Very Vanilla card stock, and cut in shape of tag.
4. Stamp flower image in Barely Banana ink on Very Vanilla card stock, and punch out using Spring Bouquet Flower punch. Adhere bead to center of flower, and adhere flower to tag.
5. Punch out graph Spring Showers paper using Word Window punch. Fold over top of tag, and adhere. Punch hole through all layers using 1/16" Circle punch, and tie to triangle ring fastener with linen thread.

Tuesday, March 21, 2006

Today's Stampin' News

Stampin' Up! is Key Sponsor of Scrapbooks, etc. Magazine's Ultimate Scrapbook Room GiveawayThe Better Homes & Gardens magazine, Scrapbooks etc., is having a Ultimate Scrapbook Room Giveaway. And Stampin' Up! is the key sponsor! As part of our sponsorship, Scrapbooks, etc. will feature Stampin' Up! products in a series of articles beginning with the March/April issue. Readers will have a chance to win an entire room full of sponsors' product featured in the articles including Stampin' Up!'s stamps, inks, organizational tools, and accessories.

Spread the Word: Stampin' Up! Technique Classes Taught at
Creating Keepsakes Conventions!Stampin' Up!'s talented art team created three marvelous cards which class participants will stamp using a variety of techniques, including the Donna, rock and roll, and markers. Participants will use Stampin' Up! stamps, inks, markers, card stock, punches, ribbon, and accessories to make each card. They will also have the chance to win a Stampin' Up! stamp set in each class.The class featuring Stampin' Up! techniques and products will be taught two or three times during each Creating Keepsakes convention. And the estimated attendance for each class is between 70-90 people.

2006 Creating Keepsakes local convention:
* Charlotte, NC (August 4-5)

Monday, March 20, 2006

Crocs Rock!


Check out this picture of rockin' Crocs from donnadowney.typepad.com

What a Crazy Day!


Today was a Crazy Day ... but in a good way! Here it is the first official day of spring and what happens ... it sleets! For over an hour the sleet fell hard! Saturday my 12 year old was wearing shorts and today (spring) it sleets! Crazy!

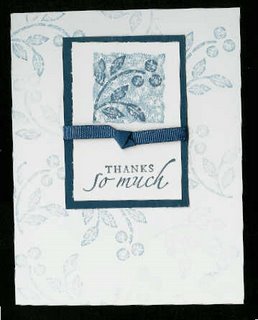
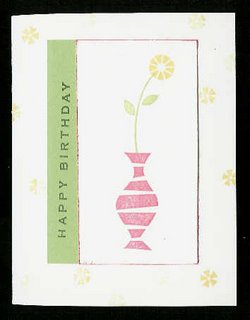
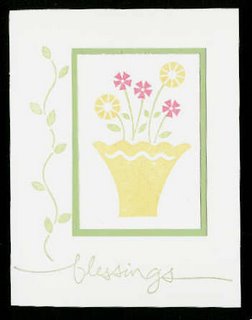
This morning I went to the local Sr. Center (where my good friend, and stampin' buddy works) and we made cards with the clients to celebrate Craft Month. I think they enjoyed it! I know I had a crazy great time! Those are the cards you see above. Very simple, but great for the seniors.

The best part of my day was going by the mall on my way home ... I bought my first pair of Crocs.
YEAH BABY! I am now the proud owner of a black pair of Crocs! I'm getting a pink pair too -- but pinks were out of stock today.

So, today was an Awesomely Crazy Day! I'm lovin' it!

Dominoes


images copyright 1995-2006 Stampin' Up!


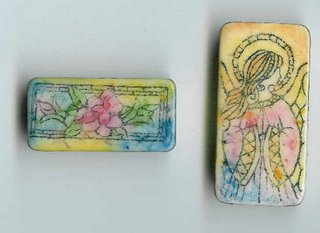
Stamping on dominoes is our next tutorial. Done basically like the tumbled tile below. It's easy and fast because of the small size, not to mention that dominoes are very versatile. Dominoes can be made into a magnet, necklace or pin (w/ a magnetic name badge backing suggested), Christmas ornament, etc.

Soak dominoes in bleach overnight to remove finish.
Rinse well and dry.
Stamp dominoe with Stazon - I used black.
Make sure ink is dry (only a few seconds) and begin coloring in w/ pastels using q-tips.
Edge dominoe with painty pen in gold or silver
Ink face of dominoe with Versamark and dip into Glassy Glaze thick embossing powder
Heat with heat gun until Glassy Glaze melts -- caution dominoe gets very hot --
Don't overheat or ink will begin to bleed.
Attach magnet to back, glue bead to top for necklace, or drill a hole in the dominoe to hang.

Sunday, March 19, 2006

Things I know

Turning 40 was no big deal for me. People love to tease about the *big* birthday, etc. But I felt no different at 40 than I did at 30 (for the most part, anyway). However, turning 41 has been a totally different story! I don't know why but I've really started looking inward, and outward at my life. I am confused sometimes about what my goals should be, what plans I should be making now that I am middle-aged. I'm not where I thought I would be at this age... I'm not completely sure where I expected to find myself at 41, but some things in my life are just not what I had hoped for, and I feel terribly guilty at times for feeling that way, and I often think I am being selfish to feel less than content at times. So, this morning in church, I thought ... "since I feel like I don't know so much anymore, why don't I start focusing on the things that I do know." So here's the beginning of my list of "Things I Know"
  1. I know I love my husband more than anyone else in the world.
  2. I know that my husband loves me with unconditional love.
  3. I know that my husband is one of the kindest persons I've ever met.
  4. I know that I love my 3 kids.
  5. I know that they love me, imperfections and all, and that all the eye-rolling is temporary.
  6. I know that my children are happy and secure.
  7. I know that my home is a nice place to be ( I didn't say it was my dream home, or that is it always clean).
  8. I know that I have 3 or 4 exceptional friends that I can count on in any situation.
  9. I know that I love papercrafting ... possibly even obsessed with it.
  10. I know that things will be ok.

Saturday, March 18, 2006

New Project

images copyright 1995-2006 Stampin' Up!

images copyright 1995-2006 Stampin' Up!


I prepared for my stamp club at the very last minute ... so unusual of me -- lol! This is one of the projects I came up with and I really like it. I'm not so good at using tons of embellishments, but I think this card works with very few layers and embellishments.

The envelope is the new 5-in-1 template from SU!. Go here or here to learn more about the template in the new Spring Mini catalog.

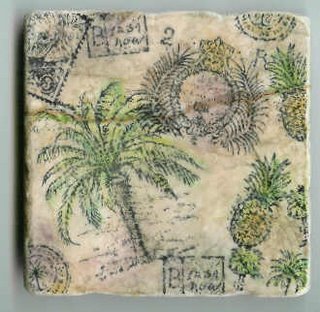
Pastels on Tiles


images copyright 1995-2006 Stampin' Up!


This idea makes a wonderful gift! Everyone who makes a tile just loves them. They are so easy -- that's the best part.

Start with tumbled tiles -- I like Bottichino tumbled tiles sold at Lowes and Home Depot -- make sure the tiles you choose do not have a glaze on them. If they are shiny, or seem to have a finish, they will not work with this technique.

Wipe your tile to remove any dust.
Stamp images with Stazon ink.
Begin coloring in images w/ Pastels. I use a q-tip.
Smudge color around the edges and in the blank spaces if you like. This adds depth to the final product.
Spray lightly with a clear matte sealer - make sure you are outside or have good ventilation!
Glue cork to the back and you are done!
Enjoy!

Monday, March 13, 2006

Playing with Pastels (chalks)

image copyright 1995-2006 Stampin' Up!


Pastels, or Chalks are such fun to play with and add a touch of depth to your stamping projects. Over the next several posts, I will list ways to utilize your pastels to get the most from them. In this post, we'll start with the basics:

Pastels may be applied with sponge tipped applicators (such as an eye makeup applicator), sponge daubers, blender pens, pom-poms or the plain old Q-tip (my preference since they are cheap and available in abundance).

When applying pastels to your projects don't worry about being perfect. A little smudge outside the lines creates an "artistic effect". Blend colors as desired.

After coloring with pastels, place your project aside for a few minutes to allow the pastels to set.

Fixatives aren't always necessary. If the project is a quick card, you can skip the fixative. If your project is intended to be permanent, such as a gift item, or scrapbook, a quick spray from an archival matte sealer is best. Don't over spray.

Frequently pastels break. This is normal because the medium is soft. Broken pastels do not affect their use in any way.

Thursday, March 09, 2006

Inklings for the confused ...

One of the questions I am asked most often by new stampers is why are there so many different types of ink? That's an excellent question, and one I didn't have an answer to before I threw myself into stamping! Here is a brief explanation that I hope will make sense.

Dye Ink - (aka Classic ink) - Dye or Classic ink is water-based. It cleans up quickly and easily with plain water. Dye ink dries rapidly and therefore is less likely to be smeared while you are working {however, remember since dye ink is water-based any moisture will cause the ink to smear or run}. Dye ink works best when stamping on cardstock or paper.

Pigment Ink - (aka Craft ink) - Pigment or Craft ink is not water-based, takes longer to dry and is perfect for heat embossing with those wonderfully colored powders! This ink is thicker and also more opaque than dye inks. Once dry pigment inks are fairly permanent so they work well on fabrics (be sure to heat set with an iron), walls, wood and other craft projects with porus surfaces. If you enjoy scrapbooking, consider using Pigment inks and embossing for the most permanent image.

Chalk Ink - (aka Colorbox) - Chalk inks are a unique hybrid of dye and pigment ink. They dry quickly, are permanent, acid free and have a beautiful matte finish. When stamping with chalk ink on fabric, be sure to heat set.

Solvent Ink - (aka Stazon) - Solvent ink is fantastic for stamping on non-porus surfaces such as glass, acrylic, plastic, transparencies etc. Solvent ink not water soluable which makes it the perfect choice for stamping an image on cardstock, or other papers that you wish to watercolor. Solvent ink should not run or bleed when exposed to moisture.

Embossing Ink - I am listing embossing ink here because of it's unique use. There are two types of embossing ink (other than pigment ink listed above): Watermark and Tinted.

Watermark ink (aka Versamark) has no color! It is clear and when used as stamping ink only will slightly darken the paper to leave a faint image similar to a watermark. Watermark ink dries slowly and is perfect for heat embossing with any color of embossing powder, including clear, and on any color of cardstock.

Tinted ink (aka Top Boss) has a slight pink tint to the ink so that you are able to see exactly where your image is stamped. This can be an advantage in many ways, but can also limit your options for stamping. Tinted ink dries slowly and must be heat embossed with a colored embossing powder. In addition, it does not dry clear as Watermark ink, excluding the watermark effect when left to dry without heat embossing.

Most inks are acid-free, however, before using ink in scrapbooks or other archival materials be sure to check the label!

Sunday, March 05, 2006

Starting Over


I am starting over with my blog. It just wasn't going in a direction that was productive! Since stamping and scrapbooking are my passion, I will continue to include those elements, but I hope to make this a more interesting blog to visit. I promise to make the next post much more interesting! Until then ... ta-ta!