
 This is a card I made last year. I only made a couple, so I'm considering it for Christmas cards again this year. The technique is called Ghosting. It's simple enough and makes a gorgeous image with lots of dimension. Believe it or not, I made a few cards with the same snowflake image in rose and they were drop dead gorgeous.
Saturday, September 30, 2006
Christmas is a'coming
This is a card I made last year. I only made a couple, so I'm considering it for Christmas cards again this year. The technique is called Ghosting. It's simple enough and makes a gorgeous image with lots of dimension. Believe it or not, I made a few cards with the same snowflake image in rose and they were drop dead gorgeous.
Wheeling along ...
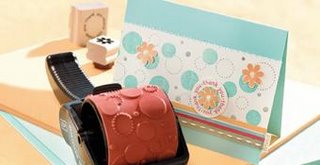 I love this new wheel, and stamp set with SPOTS! So adorable.
 Stamping is amazingly quick and easy when using a Stampin' Around wheel. You can use the wheels with ink cartridges, or ... if you're like me {wink}, you can simply roll the wheel over a stamp pad. The wheels ink up just fine using a pad as long as you are making a card or other small item. The ink will run out if you're attempting a scrapbook page - so always use an ink cartridge for any items larger than 5 1/2 inches.
Directions:
1) Remove the cover of the ink cartridge and insert cartridge into the handle.
2) Snap the wheel into the handle.
3) Push the cartridge forward so the inked surface rests against the wheel.
4) Roll the wheel on scratch paper or Stampin' Up! Grid Paper to ensure it is thoroughly inked.
5) Push or pull (whichever works best for you) the wheel across your paper or card stock, starting before the edge of the paper and continuing off the other edge. Always roll in the same direction to keep the wheel thoroughly inked. Keep your wrist steady to avoid rocking the wheel. For best results, keep the cartridge well inked.
6) To wheel straight lines use the wheel guide {shown below}. You'll save yourself lots of time and stress with this guide.

Tips:
1) Roll the wheel slowly and firmly across the paper to achieve a darker image.
2) Place your forefinger on top of the handle while wheeling. This will help steady the wheel and prevent it from rocking and creating a smudged image. I find this is essential to a clear image.
3) To keep my cartridges moist when not in use, I seal them up in sandwich baggies.
4) If you're right handed, start rolling the image on your paper from right to left. This will enable you to see the image while rolling and your hand won't be in the way. If you are left handed, roll from left to right.
Wheels work great on an assortment of projects like on a scrapbook page, gift packaging, card, envelope, or letterhead. Stampin' Around wheels are not only versatile, but they're a great value too. While only one handle is necessary, sometimes you will find an extra handle is always useful for projects stamped with multiple wheels or when more than one family member wants to use a wheel.
Saturday, September 23, 2006
Reminder and new class: Art Journal
I wanted to post a quick reminder for the Christmas Card Stamp-a-Stack coming up in October {see detailed post below}. If you are really interested, please give me a shout by Oct. 1 because that is the date I'm ordering supplies. I plan to order extra, but for those who know you want to attend, it will help me with counting the sheets of cardstock I'll need. However, if you aren't sure, and still want to come ... it's {almost} never too late ... just give me a call! Now on to the more interesting news ...
 This is a new class I am working on using the On Board Art Journals. These journals are easy to personalize for gifts ... and the holidays are a'coming! I'll post more info once I have a date for the class. Or, if you're the real crafty type, you can get started with the On Board journals yourself!
This is a new class I am working on using the On Board Art Journals. These journals are easy to personalize for gifts ... and the holidays are a'coming! I'll post more info once I have a date for the class. Or, if you're the real crafty type, you can get started with the On Board journals yourself!
Saturday, September 16, 2006
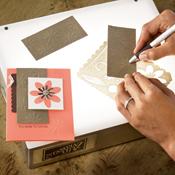
Dry Embossing
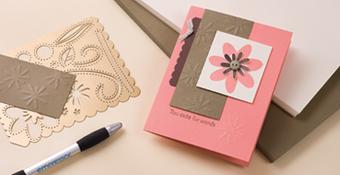
Here's a quick lesson on making elegant cards with dry embossing.
1) Secure the Classy Brass template to a light source (a light table or window) with a small piece of tape.
2) Rub waxed paper on the surface of the card stock so the stylus will glide more smoothly and to help prevent tears in the paper.
3) Place the paper or card stock face down over the template, positioning it so that you'll have the image where you want it.
4) Using the large end of the stylus tool, press the paper through the open areas of the template. This will produce a raised image. Use the small end of the stylus to emboss small areas if needed.
Tips:
1) When dry embossing a large open area, press only around the edges of the template, not the entire open area.
2) If a colored raised image is desired, replace the brass template on the right side of the card. It will act as a mask to protect the unraised surfaces. Apply color with a small sponge or sponge daubers using our ink pads or Stampin' Pastels.
3) If you're having a hard time seeing the template through some of our darker colors of card stock, try dry embossing on our background papers instead.
4) Classy Brass templates aren't the only product we carry that works great with dry embossing. Try any of our shape or journaling stencils, the Plaidmaker, even The Tearing Edge!
Tuesday, September 12, 2006
Stamp-a-Stack of cards for Christmas

I'm hosting a Stamp-a-Stack event on October 24 & 27 where you can come a stamp a whole stack of cards for Christmas.
Here are the details:
12 cards {3 each of 4 different designs} for $25 - stamp club members receive a discount as always.
Everything is pre-cut and ready for you to go to work! We'll stamp to Christmas Carols and snack on chocolate. In one evening, you can stamp as many sets of cards as you like.
Stampers can choose how many sets of cards to make - remember each set will make 12 cards.
Stamp-a-Stack will be held two separate dates for your convenience. Pick the date that works best with your schedule -- or come both nights and make more cards!
* Tuesday, October 24 @ 6:30 pm
* Friday, October 27 @ 6:30 pm
RSVP by October 1 for a special goodie prize!
However, I will take sign-ups until all seats are filled ...
The cost is $25 for each set of 12 cards. Stamp Club members receive a discounted price of $21 per set.
Monday, September 11, 2006
neat-o website
This is a very neat website. I've visited it before, but today I looked over the entire site and really liked what I saw.
PAGE MAPS Becky has maps or sketches of cards and scrapbook ideas. The card maps are especially useful when you have a mental block and need to churn out a few cards. Take a look at her site and see what you think.
PAGE MAPS Becky has maps or sketches of cards and scrapbook ideas. The card maps are especially useful when you have a mental block and need to churn out a few cards. Take a look at her site and see what you think.
Thursday, September 07, 2006
Just a quick reminder of upcoming events:
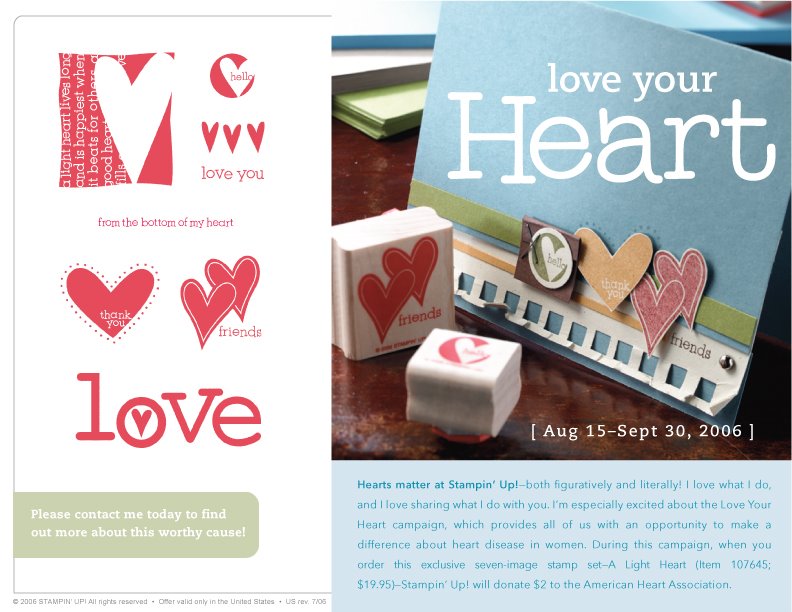
Tuesday, Sept 19 - Love Your Heart Stamp Camp
A $2 donation from all purchases of A Light Heart Stamp Set go to the American Heart Association.
$30 w/ stamp set
$10 w/out stamp set
Friday, Sept 29 - Spartanburg Stamp Club meeting
Yea!
Shoshannah is our Hostess w/ the Mostess!
Tuesday, September 05, 2006
 This is the board in my office/craft room. I thought I'd share it today as a little window into my world. I don't change the items on the board often, because most of them are things I like to look at ... photos our family, friends and a drawing by my youngest son. There are also 3 calendars {?}, a note on how to restart our internet connection when it goes down, and a color chart for SU colors to use with my printer. Not much, but this little board tells a lot about me! What items in your home tell your story?
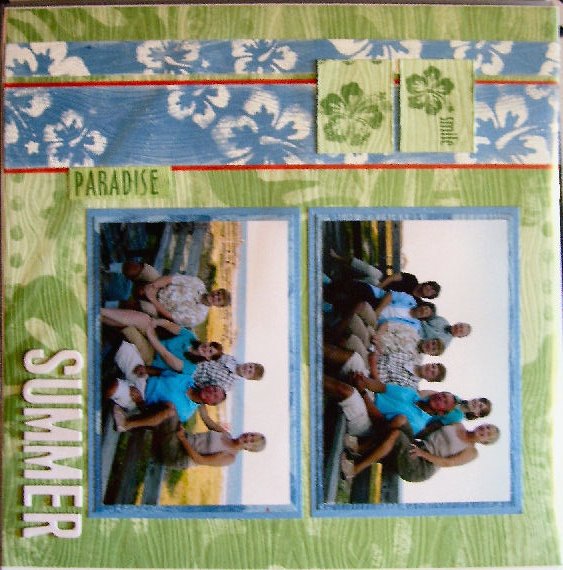
I was going to show one more scrapbook page I complete this weekend - but blogger keeps turning the photo on it's side? I completed 3 whole pages for a 4 day weekend ... wow ... at this rate I'll be caught up by 2065.

Subscribe to:
Posts (Atom)


