Thursday, October 19, 2006

Who's up for a Challenge?

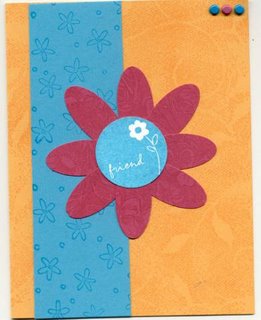
image from Emilymomto3boys on Splitcoaststampers.com


Each week challenges are posted on Splitcoaststampers.com. This week the color challenge is to make a card, scrapbook page, or project using the following colors: Tempting Turquoise, Certainly Celery and Blush Blossom. Click here to read the actual challenge post: SCS Color Challenge.

Emilymomto3boys posted this week's challenge, and that is her card you see posted above. She is a very talented stamper, as you can tell! Emily used the new SU Paisley stamp along with Linen, the SU chipboard flower, cardstock and some Basic Grey patterned paper for a totally awesome card.


Challenges can be inspiring, help you over a case of creative block and usually motivate me to move out of my color rut ... you know, using the same combinations over and over because they are safe, and they work.


If you make a card, you can upload it to SCS, and I would love it if you send a copy to me as well. Happy Stampin'!

Sunday, October 08, 2006

Country Blessings

Wow! I am really excited about the newest promotion from my favorite stamp company. Stampin' Up! has partnered with Country Living magazine to offer a stamping kit with everything needed to complete 8 projects plus an exclusive die-cut stamp set. In addition, Stampin' Up! customers have the opportunity to subscribe to Country Living magazine at the incredible rate of only $12 for one year. Contact me if you are interested in ordering this set - available from October 6 - November 30, 2006.


The exclusive Country Living Autumn Elegance Country Blessings Stampin' Kit includes all of the following items:

  • Country Blessings die-cut stamp set
  • 8 pieces of eight inch Chocolate grosgrain ribbon
  • 8 pieces of six inch Natural Hemp
  • Antique Brass Hodgepodge Hardware
  • 8 pull tabs
  • 16 brads
  • 8 sheets of glue dots
  • 1 watercolor brush
  • 10 Natural Ivory envelopes
  • 4 Classic Stampin' Spots {always artichoke, choc. chip, more mustard, ruby red}
  • 4 sheets of Always Artichoke cs
  • 2 sheets of More Mustard cs
  • 2 sheets of Naturals Ivory cs

This is a special, limited-time offer and available only while supplies last. $49.95. It would also make a great gift for the holidays, especially if you know someone who wants to learn how to begin making their own cards and papercrafts.


Click HERE to read the entire online article from ivillage.

Click HERE for 6 Table Favors made with the Country Blessings stamp set.

Monday, October 02, 2006

How cool is this?

I found this on another stamper's blog: Altered Container
She has taken the Stampin' Up containers that buttons/brads/eyelets come in and altered it. Here's another shot: Altered Container Insides

Saturday, September 30, 2006

Christmas is a'coming

This is a card I made last year. I only made a couple, so I'm considering it for Christmas cards again this year. The technique is called Ghosting. It's simple enough and makes a gorgeous image with lots of dimension. Believe it or not, I made a few cards with the same snowflake image in rose and they were drop dead gorgeous.

Wheeling along ...

I love this new wheel, and stamp set with SPOTS! So adorable.

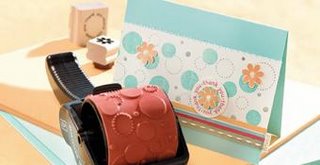
Stamping is amazingly quick and easy when using a Stampin' Around wheel. You can use the wheels with ink cartridges, or ... if you're like me {wink}, you can simply roll the wheel over a stamp pad. The wheels ink up just fine using a pad as long as you are making a card or other small item. The ink will run out if you're attempting a scrapbook page - so always use an ink cartridge for any items larger than 5 1/2 inches.

Directions:
1) Remove the cover of the ink cartridge and insert cartridge into the handle.
2) Snap the wheel into the handle.
3) Push the cartridge forward so the inked surface rests against the wheel.
4) Roll the wheel on scratch paper or Stampin' Up! Grid Paper to ensure it is thoroughly inked.
5) Push or pull (whichever works best for you) the wheel across your paper or card stock, starting before the edge of the paper and continuing off the other edge. Always roll in the same direction to keep the wheel thoroughly inked. Keep your wrist steady to avoid rocking the wheel. For best results, keep the cartridge well inked.
6) To wheel straight lines use the wheel guide {shown below}. You'll save yourself lots of time and stress with this guide.


Tips:
1) Roll the wheel slowly and firmly across the paper to achieve a darker image.
2) Place your forefinger on top of the handle while wheeling. This will help steady the wheel and prevent it from rocking and creating a smudged image. I find this is essential to a clear image.
3) To keep my cartridges moist when not in use, I seal them up in sandwich baggies.

4) If you're right handed, start rolling the image on your paper from right to left. This will enable you to see the image while rolling and your hand won't be in the way. If you are left handed, roll from left to right.

Wheels work great on an assortment of projects like on a scrapbook page, gift packaging, card, envelope, or letterhead. Stampin' Around wheels are not only versatile, but they're a great value too. While only one handle is necessary, sometimes you will find an extra handle is always useful for projects stamped with multiple wheels or when more than one family member wants to use a wheel.

Saturday, September 23, 2006

Reminder and new class: Art Journal

I wanted to post a quick reminder for the Christmas Card Stamp-a-Stack coming up in October {see detailed post below}. If you are really interested, please give me a shout by Oct. 1 because that is the date I'm ordering supplies. I plan to order extra, but for those who know you want to attend, it will help me with counting the sheets of cardstock I'll need. However, if you aren't sure, and still want to come ... it's {almost} never too late ... just give me a call! Now on to the more interesting news ...


This is a new class I am working on using the On Board Art Journals. These journals are easy to personalize for gifts ... and the holidays are a'coming! I'll post more info once I have a date for the class. Or, if you're the real crafty type, you can get started with the On Board journals yourself!

Saturday, September 16, 2006

Dry Embossing


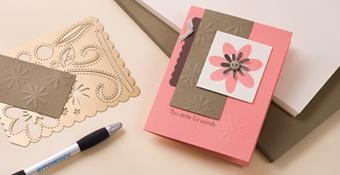
Here's a quick lesson on making elegant cards with dry embossing.

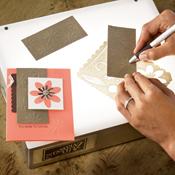
1) Secure the Classy Brass template to a light source (a light table or window) with a small piece of tape.
2) Rub waxed paper on the surface of the card stock so the stylus will glide more smoothly and to help prevent tears in the paper.
3) Place the paper or card stock face down over the template, positioning it so that you'll have the image where you want it.
4) Using the large end of the stylus tool, press the paper through the open areas of the template. This will produce a raised image. Use the small end of the stylus to emboss small areas if needed.


Tips:
1) When dry embossing a large open area, press only around the edges of the template, not the entire open area.
2) If a colored raised image is desired, replace the brass template on the right side of the card. It will act as a mask to protect the unraised surfaces. Apply color with a small sponge or sponge daubers using our ink pads or Stampin' Pastels.
3) If you're having a hard time seeing the template through some of our darker colors of card stock, try dry embossing on our background papers instead.
4) Classy Brass templates aren't the only product we carry that works great with dry embossing. Try any of our shape or journaling stencils, the Plaidmaker, even The Tearing Edge!

Tuesday, September 12, 2006

Stamp-a-Stack of cards for Christmas


I'm hosting a Stamp-a-Stack event on October 24 & 27 where you can come a stamp a whole stack of cards for Christmas.

Here are the details:
12 cards {3 each of 4 different designs} for $25 - stamp club members receive a discount as always.

Everything is pre-cut and ready for you to go to work! We'll stamp to Christmas Carols and snack on chocolate. In one evening, you can stamp as many sets of cards as you like.

Stampers can choose how many sets of cards to make - remember each set will make 12 cards.

Stamp-a-Stack will be held two separate dates for your convenience. Pick the date that works best with your schedule -- or come both nights and make more cards!


* Tuesday, October 24 @ 6:30 pm
* Friday, October 27 @ 6:30 pm


RSVP by October 1 for a special goodie prize!
However, I will take sign-ups until all seats are filled ...

The cost is $25 for each set of 12 cards. Stamp Club members receive a discounted price of $21 per set.

Monday, September 11, 2006

neat-o website

This is a very neat website. I've visited it before, but today I looked over the entire site and really liked what I saw.
PAGE MAPS Becky has maps or sketches of cards and scrapbook ideas. The card maps are especially useful when you have a mental block and need to churn out a few cards. Take a look at her site and see what you think.

Thursday, September 07, 2006


Just a quick reminder of upcoming events:
Tuesday, Sept 19 - Love Your Heart Stamp Camp
A $2 donation from all purchases of A Light Heart Stamp Set go to the American Heart Association.
$30 w/ stamp set
$10 w/out stamp set

Friday, Sept 29 - Spartanburg Stamp Club meeting
Yea!
Shoshannah is our Hostess w/ the Mostess!

Tuesday, September 05, 2006


This is the board in my office/craft room. I thought I'd share it today as a little window into my world. I don't change the items on the board often, because most of them are things I like to look at ... photos our family, friends and a drawing by my youngest son. There are also 3 calendars {?}, a note on how to restart our internet connection when it goes down, and a color chart for SU colors to use with my printer. Not much, but this little board tells a lot about me! What items in your home tell your story?

I was going to show one more scrapbook page I complete this weekend - but blogger keeps turning the photo on it's side? I completed 3 whole pages for a 4 day weekend ... wow ... at this rate I'll be caught up by 2065.

Monday, September 04, 2006


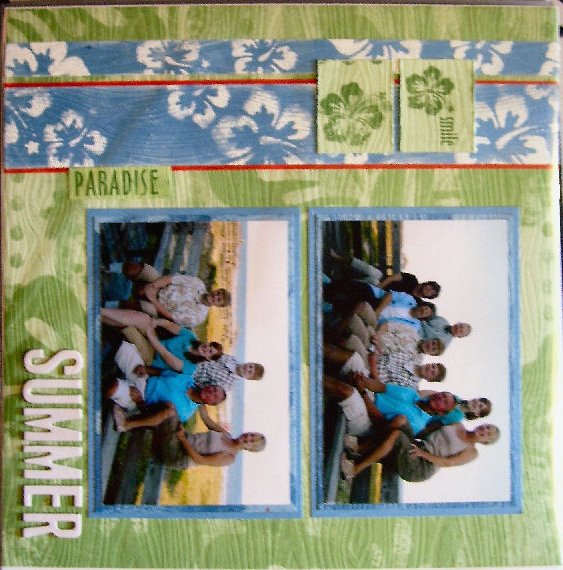
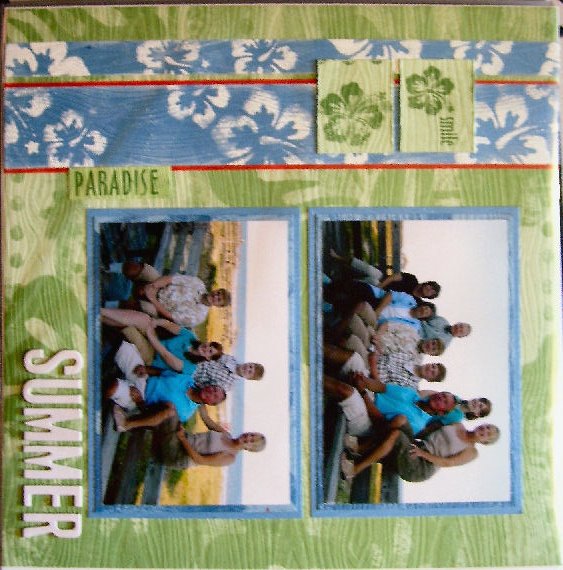
I had hoped to scrapbook all weekend - so far, only 2 pages, and I'm willing to show only one of them! Well, I still have one day left. This is from the beach this summer. Supplies by Club Scrap. The ribbons hold a tag w/ journaling.

Tuesday, August 29, 2006

Stampin' Fairy

The Stampin' Fairy was at my house Friday night! She came bearing goodwill for all. See if you can find her:


But then the Fairy was tragically overpowered by the evil princess who stole her crown and tapped her on the head with the magical wand as we all watched in horror:

Soon, however, order was restored, the evil princess repented, and the world was happy again:


The End.

what a wonderful world


remember that song?

I see trees of green, red roses too
I see them bloom from me and you
But I think to myself what a wonderful world

I see skies of blue, clouds of white
bright blessed days, dark sacred nights
but i think to myself what a wonderful world

The colours of the rainbow so pretty in the sky
Are also on the faces of people passing by
I see friends shakin' hands saying "How do you do?"
They're really saying "I love you"
I hear babies crying, I watch them grow
They'll learn much more than I'll never know
But I think to myself what a wonderful world
I think to myself what a wonderful world
Hey, yeah, wonderful, wonderful world
When I look at these photos from our summer vacation at my sister's, that song echoes in my head. It just doesn't get much better than this:

Sunday, August 27, 2006

As I promised


We're back to stamping! Today, we will go over heat embossing. If you stamp with me, then you've embossed. This is a simple tutorial but it must come before we go on to more detailed embossing techniques.

Directions:
1) Place your card stock in a Powder Pal tray (or over a large piece of scratch paper).
2) Rub the Embossing Buddy across the paper or card stock you want to emboss. (This keeps embossing powder from sticking anywhere but on the ink.)
3) Stamp image with Craft, VersaMark, or embossing ink {like Top Boss}.
4) Pour powder onto the inked image, making sure that the image is coated completely.
5) Shake off excess powder into the tray and funnel it back into its container.
6) Heat the stamped image with the heat tool until the powder changes to a shiny liquid and raises.
7) Allow embossed image to cool.


Tips:
1) Don't overheat the powder, as it can scorch the paper.
2) Try embossing using Classic pads on vellum paper. Dye inks take longer to dry on vellum so embossing powders will adhere to the ink and can be embossed.
3) To add a brighter touch to computer-printed text, sprinkle embossing powder on the card stock as it is coming out of the printer. Be fast! This is quick-drying ink!

Saturday, August 26, 2006

All Blog ... all the time

Blogging is wonderful, quick and free, so I'm going to all blog, all the time.

A few quick items:
First, I'm deleting my Stampin' Up! website because
{a} it's not cheap and
{b} it doesn't seem to be really serving the purpose I had hoped.
Maybe in the future I'll consider it again, but for now, my money can work for me in other areas with more results. I'll continue to send emails out with class/club info, and post upcoming events here as well.

Second, there may be a few minor changes to the Stamp Clubs. I'm trying to re-evaluate my time after a terribly hectic summer.

I almost lost "it" a few times this summer {not sure what "it" really is, but you get the idea here}. It was tough, and I finally reached the point where I realized I need to re-priortize my life. This is something I have neglected for a long time - you know how it happens, you start one thing, then think, well I could add another, I'm not that busy ... then before you realize it, you're overwhelmed, and you can't see light at the other end ... but how can you say NO to all these wonderful people?

The good news is that my work schedule is returning to normal. The temporary summer job has ended, and school has started back which means we'll have some sort of loose schedule now {don't want to be too confined!}

I read something this summer that really hit home. It was written by Aby Garvey who is a professional organizer. She publishes an e-zine with tips and hints about organizing your home and life to be more efficient so that you can make time for the important things. This summer, in her blog, Aby talked about cleaning out and making space - that makes perfect sense when you're talking about closets and such - but Aby was talking about making space in life. Making space for those things that are truly important.

That was the visual I needed ... it hit me and instantly I understood. I needed to create some space in my life. I needed to get in there and really clean out all those things that were keeping me from doing the important stuff. I was in the place where I found myself running around trying to please all these other people who weren't my family members. I was neglecting my family!

So, I am happy to report that I am in the process of creating space in my life, so that I can pursue the truly important things. Yes, there are the must-do things like work, but if I can clear out all the clutter, then I should have time for work, family and fun. So please bear with me while I decide what to do with all my clutter. You can read Aby's original post by clicking here: Creative Organizing

Finally, thank you ladies in my stamp clubs, what a wonderful group of ladies you are! You've been with me from the beginning and continue to add light to my life ~ I look forward to stamp clubs every month, seriously.

Signing off for now ... next post stamping related, I promise!

Monday, August 21, 2006

Proud mama again


In July I posted how proud I was of our son who just graduated from high school {we homeschooled him from 1st grade on}. If you will excuse me, I want to indulge myself again ... I'm once again very, very proud of our son - the oldest of 3 - who begin college today! As the oldest, his firsts are really big ones for mom and dad. He has also been our guinea pig of sorts while we tried to figure out this parenting thing ... despite our failings, he has turned out to be a really neat kid. He only has one class on Mondays, but it was still significant being his first day. All went well - and he came home to take a long nap as any teenager worth his weight would do!

Tuesday, August 15, 2006

Marking In Color ...

I think most everyone has seen the new *In Colors* by Stampin' Up! The colors are great ... fresh ... really nice to create cards, scrap pages, or embellish your home decor. But, there are no markers to go with these new hip colors ... until now. I learned a really neat trick from SU! that I want to share here with you:

Did you know you can create your own In Color markers with the Classic ink refill and a blender pen? Simply add several drops from the ink refill to one side of the blender pen. We found that five drops was a good amount, and our artists achieved terrific results when coloring with the marker on card stock and paper.

You can also use the pen with the Color Spritzer Tool and to color directly on a rubber image before stamping. One set of blender pens will allow you to create markers for all six In Colors


The In Color palette, a collection of six colors, is available only through June 2007.


Monday, August 07, 2006

Love Your Heart

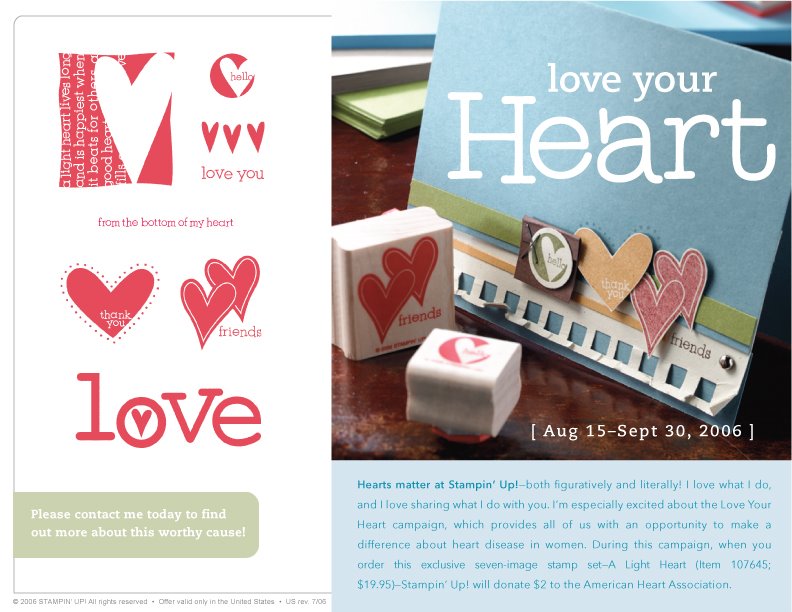
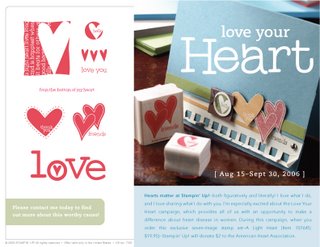
There is a new stamp set out for a limited time ... A Light Heart ... Stampin' Up! will offer this set from Aug. 15 - September 30. With each sale of the set, SU will donate $2 to the American Heart Association. What a great way to raise funds for a worthy cause. I am planning a stamp camp around this set, so watch your email for information on date and time. Below you can see a flyer with all the images from A Light Heart set.

Wednesday, July 19, 2006

acckkk

Why does my sidebar keep falling to the bottom? Why oh why?? Well, maybe as I post, it will be pushed back up to the top, maybe ...

Here is a cute card I wanted to share w/ you today. It is the new Sweet Shapes set, made with Celery and Apricot cardstock. I must confess, Apricot is my least fav color, but when it works, it looks great! I've only managed to make one card w/ Apricot that actually looked good.

images copyright Stampin' Up 1995-2006

Sunday, July 16, 2006

Photos from Mexico


Will & Ellen returned last night from Dr. Arroyo, Mexico. They loved the trip - and are already planning a summer internship for next year.

Ellen did a wonderful job photographing their trip. I'm very proud of her skill as a photographer.


Here are some of my favorite pictures. Of course, we have a ton {93 total} and I feel the need to scrapbook a special Mexico book. Click on each photo to view larger.

Thursday, July 13, 2006

Mexico


Our two teenagers have been on a mission trip since Saturday. This is their first trip! I hear they are lovin' it much. I hope they are missing mom and dad a bit too! It took a lot of prayer before I was convinced they needed to travel into Mexico this summer. Mom's not too crazy about the whole idea. But they are old enough to know if they really want to do something, and I wouldn't stand in their way when their hearts are set on a mission trip.

They are in the state of Nuevo Leon, Mexico, near Dr. Arroyo. They stayed inMcAllen, TX, overnight, crossed the border around Reynosa then headedsouth to Dr. Arroyo. At least that is the info I have at the moment. Itis a 10 hour trip. They will return to TX on Friday, and fly back toCharlotte on Saturday. Please pray for safe travel the remainder of this week, and the trip home.


Here is a weblink to the map w/ their approximate location in Mexico. http://www.dayspring.us/leon.htm I will post some pictures once they are home and we get them uploaded to the computer.

Tuesday, July 11, 2006

good day...

Yesterday was a good day! Lane is turning 13 t his week and since he isn't having a party, he wanted to ask a friend over. We saw Pirates of the Carribean, went to a comic shop to buy his present and then came home for late night video games. I don't know what time they actually went to sleep, but it's almost 10 am and no one is awake yet! It was a nice day to hang out, and the movie was great! I'll post a pic when I get them uploaded.

Monday, July 10, 2006

Templates Galore!

You can find almost any template you're looking for at this site Mirkwood Designs. I've also listed it in the sidebar for future reference.

Sunday, July 09, 2006


Reverse Spotlighting
Directions:
1. Stamp images in Basic Black ink.
2. Punch random holes in stamped images (1-3/8" and 1/2" Circle punches used in example).
3. Stamp and cut out the same image on pieces of colored card stock.
4. Line up and mount images behind punched holes.
5. Trim overlaying images with scissors or paper cutter.
6. Mount images into place for completed project.

Special thanks to Michelle Halleen for the card idea submitted on Cruise 2002.

Click on the photo to the left to enlarge. Sorry it came out so small!

Tuesday, July 04, 2006

Proud Mama


I'm a proud mama ... I'm proud of all 3 of our children who are gifted in their own individual ways, but today I want to share a few things about Will. He is our oldest child, and just graduated from high school {we homeschool, btw}. Here is his photo just after graduation. I would say he was happy! We're so proud of him and are excited to watch him move into another phase of his life. It's not always easy for mama to watch him grow so independent of me, but he's a smart kid and will do well.

The other thing I wanted to share was about his love of music. He lives to play {bass, guitar, drums}. He and a good friend have started a project call the Window Shoppers. My daughter is their photographer and they came up with this photo the other day ...


Isn't that just the coolest? It's an acoustic deal, and neither one of the boys are confident in their vocal skills, but they are killer musicians and I think they just might have something here ...

back to blogging?

Gosh! It's been such a long time since I blogged! I am so ashamed of myself. I promise to do better this summer. It's been a combination of being too busy and being frustrated w/ blogspot. Everytime I try to do something to make my blog really cool, it doesn't work and throws my entire sidebar down to the very bottom. Frustrating! I also had a non-functioning scanner. I got that problem corrected, so now maybe, just maybe I can get back to semi-regular blogging.

Tuesday, May 09, 2006

Brayer Fun


Here is a totaly cute card from a new publication by Papercrafts magazine. The flower is made by stamping Lexicon of Love (Stampin' Up!) several times, then cutting the stamped images into petals and piecing a flower, finishing off w/ a clear button for the center. The tags are made by wrapping a brayer with rubber bands, then inking it and rolling over your paper. As shown below:

You can see the card with instructions by clicking here or cut and paste this address into your browser: http://www.papercraftsmag.com/paperparties/category.ihtml?idx=290

Thursday, May 04, 2006

National Scrapbook Month

I can't emphasize how important my scrapbooks are to me, and my family. It's such a joy to look back at the kids when they were small and remember all the little things. And it gives them their own history, concise, in photos and a few words. I don't know anyone who doesn't enjoy looking at photographs and savoring the memories they bring.

Since May is National Scrapbook Month, I wanted to include a link to help you jumpstart your creativity:
http://www.creatingkeepsakes.com/images/ftp_images/cku/nsd/sc1.pdf

It doesn't matter if you are a long time scrapper, or thinking of beginning. To me, scrapbooking is one of the most important things I can do for my family ... and for me. Scrapbooking is my time to relax. Just to enjoy myself and the process. I don't make award winning pages. I've never gone on a weekend scrapbook retreat. I just try to carve out a few minutes here and there to make a page. To document that particular point in history - for them, for me.

Use the link above and try something. Even a small page, or a photo card. It's fun.

Monday, May 01, 2006

A Fond Farewell?


Now that the Stampin' Up! retirement list is out ... here 's what I think.
I'm glad to see some of the sets go .. I mean, really, what were they thinking (ie Charming Children)?
But these are the sets that I can't believe are leaving:
  • Shapes & Shadows - (so contemporary!)
  • Flower Garden
  • Fresh Fruits
  • Set Sail - (such a great Father's Day set - and just ordered it, of course!)
  • By Definition - what??
  • Stencil alphabet & numbers - (very versatile if you kiss it w/ another stamp!)

However, the best part is that there are going to be so many new sets introduced in July! Be on the lookout for lots of new backgrounds and alphabets! There are 10 alphas and 10 backgrounds retiring ... oh boy! You could venture to guess that background and alphabets are amoung my favorites.

Saturday, April 29, 2006

Stamp Time!


all images copyright 1995-2006 Stampin' Up!

Did I mention that I like to stamp? No, I LOVE to stamp! It's such fun. I think because I can start and finish a project in one sitting. I love to scrapbook too, but the process takes me longer to complete.

The card above was an invitation to my stampin' girlfriends. The background is stamped using a college type of technique, frequently called a One Sheet Wonder. It's so simple and wonderful for mass producing cards.

Take a full sheet and randomly stamp images. I try to use 3 colors of ink for variety and depth - more than 3 colors could be overwhelming and busy. You need to stamp the images closely. I even stamp some images on top of others. By stamping the images close you avoid a lot of empty space when you cut the sheet apart.

After you are finished stamping, cut your cardstock for cards. In this example I just cut the cardstock in fourths to make a background. But, you can cut your cardstock in many shapes and sizes for multiple cards. It may help you to draw a cutting diagram on the reverse side of the cardstock. Start with rectangles. Once you see the space divided up, you may venture further by dividing up the rectangles into squares or triangles.

After you're finished cutting the stamped sheet, begin to mat the images and make cards. It's a great way to use up scraps too. Use the scraps for matting the stamped images. I've seen others make anywhwere from 4 - 12 cards from one sheet of 8 1/2 x 11 inch cardstock. Pretty cool.

Monday, April 24, 2006

Wanna see something sweet?

This is then ...


This is now ...


These are photos of my daughter and her best friend. Aren't they just the sweetest pictures? The girls share such a special bond, and it is such a blessing. I am so thankful for good friends!

Saturday, April 22, 2006

What Inspires You?

Tell me.
I want to know.
Really, I do!
What inspires you?
What gets you excited and motivated to get up and do something? Here are a few things that inspire me, in no particular order of course ...
  • my family
  • spending time w/ my girlfriends
  • reading material - books, mags, etc.
  • printed papers - love them too much!
  • odd size envelopes - so much possibility
  • mini albums
  • mod podge!
  • a little bit of ink, paper and a heat gun!
  • flowers
  • chocolate (ok, maybe it doesn't inspire me, but I do enjoy it)
  • creative people
  • reading blogs by creative people and seeing their latest creations
  • learning something new
  • teaching others - sharing knowledge
  • taking classes (preferably craft classes)
  • traveling - wish we could go more often and further away ...
  • QVC (sorry, it's true - I watch waaay more than I buy - promise!)
  • pretty ribbons
  • sharing a meal with friends
  • good conversation
  • extra minutes on my cell phone
  • Barnes & Noble
  • a good movie
  • a clean house - ha, know of any??
  • quiet time (rare, oh so rare!)

So, that's my list ... please share a few of your inspirations with me. I may even post a few of them here! With your permission, of course ...

And, remember, you can read older posts and see more projects by clicking on the Archives to the right.

Shaving Cream Technique

all images copyright 1995-2006 Stampin' Up!

This is a fun technique, you can use it to make backgrounds for cards, stationary, envelopes, etc. Use your imagination! The paper smells nice too. In the example above, I used pretty in pink and barely banana reinkers.

Use a shallow rectangular pan for shaving cream, spread it around to cover the entire pan (peaks are ok). Drop 2 - 3 colors of reinker in the shaving cream, then take a knife and swirl the color enough to create a marbled look but not so much that the colors mix and get muddy.

Take your cardstock and place on top of the shaving cream making sure all the cardstock comes in contact w/ the shaving cream. Carefull lift the cardstock and wipe with a paper towel, set aside to dry. Cut and use as needed.
If you make a Shaving Cream Card, I would love to see it! Email it to me and I may post it here or in my Art Gallery HERE

Friday, April 21, 2006

Summer Mini in my mailbox!

Yes, you read the title correctly ... I have in my possession a Summer Mini Catalog! The mini isn't actually in effect until June 1, and all my stamp clubbies will receive their copy mid-May. I will post a picture when one becomes available, but until then, here are brief descriptions of some of the sets:

Basics Outline - Jumbo outline of flowers coordinates w/ Bud Basics
Buds - Jumbo solid flowers coordinates w/ wheel above and set below - you can 2 step stamp w/ the two jumbo wheels.
Bud Basics - Set of 6 solid and outline images of flowers and leaf. Reminds me of Paint Prints from SAB 2005, but yet different.
Sheltering Tree - 2 Step Stampin' set -- Stems and leaves/buds/hearts and a sun. I like this one, and I'm surprised because it's not really my type!
Petal Patch Paper - Love it, love it! I just love (did I say that already?) the new patterned papers SU is coming out with. And I love that the colors in the papers match the inks and the 48 colors. This makes scrapbooking great pages a snap.
The Wheel Thing - Cuteness all the way. There is a solid wheelbarrow, a shopping cart, a scooter and a wagon. I can imagine putting lots of things (money, gift cards, other stamped images, etc) inside these so they peek out of the top.
Cowboy Kid - Perfect for your lil' cowboy at home! Great for kids party invitations or scrapbook pages.
Laundry Notes - Undies with cute sayings: "Just a short note" (shorts), "You fit like a glove" (glove), "Slipping you a note" (slip), We'll always be tight" (tights), We're a perfect match (socks).
Spunky Alpha and numbers - Love this alpha set -- gotta have it! Reminds me of Tall Tales alpha, but smaller and w/ a bit of a curve.
Polka Dot Posies - Flowers, petals and leaves, some solid, some polka-dotted images. Really cute.
Shore Thing - Solid beach images. More cartoonish than last year's mini set.
Flip Flop wheel - solid image flip flops to match "Shore Thing" set CUTE!
Going my Way - sJumbo wheel. of a school of fish, also matches "Shore Thing"
Edgy Eloquence - Great word set with quotes from WC Fields, Abraham Lincoln, etc.
By Sea - Boats, submarine, life preserver, etc. including the word "Glub". Would be great for kids scrapbook pages and party invitations.
Clowning Around - clown stamps and a circus tent, solid image stamps.
Pattern of Friendship - Love this one with a sewing theme, includes "pattern" number and dress styles typical of sewing patterns. There is a row of dresses, and a saying.
Wish you were here - This is a nice set, not vintage, but the images are of older things like a camera and luggage, it is solid image travel set, really cool.
Nature Prints - Images look similar to rubbings, distressed slightly, fish, turtle, shell and leaf with an outline, very rustic outdoorsy looking

There is no mini catalog hostess set. That program has been discontinued, however, hostesses reaching $400 will receive an additional set of your choice beginning in July with the new catalog! Woo Hoo! I think this is a much better deal because you have a choice in the extra set you receive!

Friday, April 14, 2006

doing it digi


I don't know what you are thinking, but ... doing it digi is an online class that I signed up to take. It is all about learning how to make scrapbook pages digitally. I made my first page today and it was a real brain strain! Maybe if I was 21 insted of 41 it would be easier?

The photo I used on this page (which is the cover page for my digi album) was taken by my daughter last fall when the leaves were changing. The leaves are from the maple tree in our front yard. I think she did a pretty good job with the photo, don't you?

Anyway, I am learning how to scrapbook in a new way and I'm very excited about it! After I struggled through the first page I made 4 more pages. Yes, it did take me all afternoon and into the evening ... but it is fun. If you're interested visit www.bigpicturescrapbooking.com for more information on the digital scrapping class.

Thursday, April 13, 2006

Happy Easter! This is a simple card to create for a last minute Easter hello. The set used is Never-ending Joy. I used Cameo Coral and Old Olive cardstock, white as the base for the stamped image and two white eyelets. The tulips look nice with a touch of glitter too, if you wanted to posh it up a bit.

Tuesday, April 11, 2006

Yearbook


Our homeschool group is printing a yearbook. This is our family page. I'm not sure how it will look once copied in black & white, but since I am finishing it at the last minute ... My daughter said I used too many pictures. Can you imagine her thinking such a thing? Ok, maybe I did fill every inch, but it was too hard to choose the pictures to leave out.

Saturday, April 08, 2006

Frame Decor


A simple, quick and inexpensive way to customize your home decor. This stamped frame is in my hall bath. I found the frame at Walmart - and it came just as you see here - a white frame w/ 3 mini frames in various shades of green. The colors were perfect for my freshly painted brown walls (actually, I think the color is latte) !

This particular project has no layers! It is stamped on confetti white paper with SU! Chalk Inks in earth tones. I used Petal Prints and Natural Beauty stamp sets. The cardstock is attached inside the frame with a small piece of sticky strip (red line tape) to make sure it didn't slip once hung.

To create a stunning framed piece layer and piece your stamped images and include additional embellishments such as clips, ribbon, brads and glitter.

all images copyright 1995-2006 Stampin' Up!

Sunday, April 02, 2006

Happy Easter Card

images Stampin' Up! copyright 1995-2006

I love this card because it is so simple!

Faith and Hope Stamp Set
Barely Banana, Certainly Celery & Whisper White Cardstock
Spring Flowers designer paper
Pink grosgrain ribbon
Stampin' Write markers

Inspiration

“Just don’t give up trying to do what you really want to do. Where there is love and inspiration, I don’t think you can go wrong.”
~ Ella Fiztgerald

April is National Jazz Appreciation month and I found this quote by Ella Fitzgerald which sums up things nicely.